1
Understand Calipers

A caliper is a type of measuring tool that measures the distance between two opposite sides of an object.
Calipers can measure thicknesses, distances and internal and external diameters. As a result, they’re an essential tool for auto repair, woodworking and metalworking. The tool is handy when working with projects requiring careful and precise measurement.
2
Know the Types of Calipers

There are a few types of calipers. Although they perform the same function, they have different features and scales.
Here are the different types you may use for DIY projects:
Spring Joint Calipers: These have two legs, a spring and an adjusting nut. They lack a measurement scale, so you use them with another type of measuring tool.
Dial Calipers: These calipers have a dial that displays the measurement with an indicator needle
Vernier Calipers: These calipers have two graduated scales: a main scale similar to a ruler and an auxiliary (Vernier) scale. These calipers are extremely precise and often used in navigation and by scientists, machinists and surveyors.
Digital Calipers: These calipers run on batteries and use electronics to calculate measurements. Results appear on a digital screen located near the jaws.
Tip: Digital calipers are generally the simplest to use, making them a favorite among DIY-ers.
3
Know the Parts of a Caliper
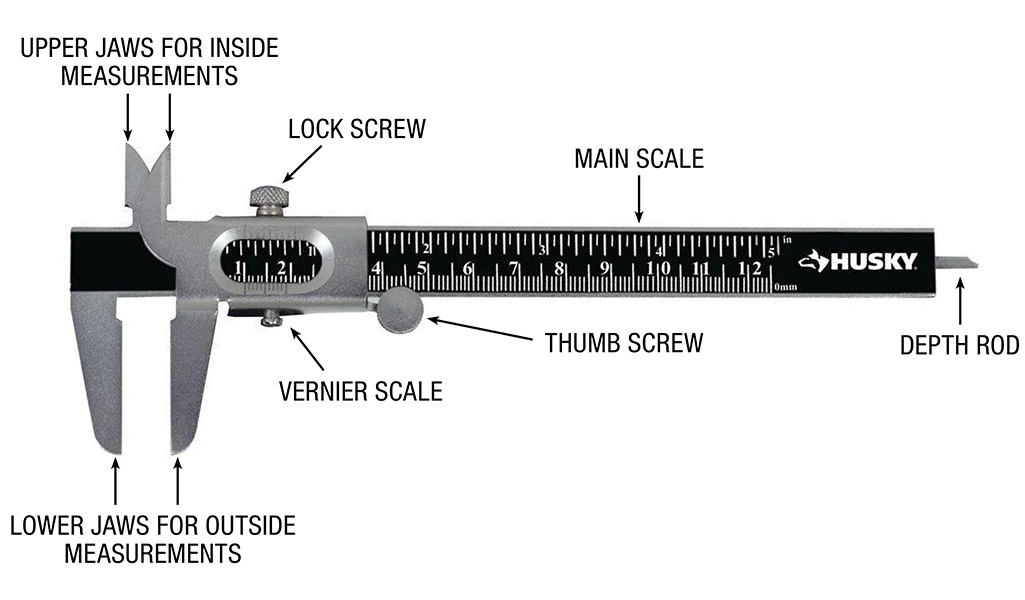
Understanding the parts of calipers is important for measuring and reading them properly. Vernier, dial and digital calipers consist of similar parts. The only difference is the measurement reader. Here are the main parts of a caliper:
- Internal or upper jaws: Used for taking inside measurements such as the diameter of a hole or slot
- External or lower jaws: Used for measuring outside dimensions such as width, length and diameter
- Lock screw: Secures the jaws into place so the object is removed without moving the caliper’s jaws
- Thumbscrew: Adjusts the measuring faces of the caliper (the jaws and the depth rod)
- Depth rod: A small rod that protrudes when the thumbscrew is turned. The rod measures the depth of the holes.
- Step gauge: Measures the distance from an edge to another point on an object
- Scale: Numbers that run along the length of the caliper and give a measurement reading
In addition to the above parts, digital calipers have a compartment for the battery. They also have buttons for turning the digital display on and zeroing out readings. Some also feature conversion buttons that let you move from inches to millimeters.
Dial calipers feature a dial display and an indicator in addition to the list of parts above.
4
Measure Inside Dimensions Correctly

Before you can read calipers, you need to take accurate measurements, so it’s important to learn how to use them correctly. To measure the inside diameter of a hole, first, unlock the top lock screw.
Then, adjust the upper jaws by sliding the thumbscrew on the bottom to the left. Move the jaws until they’re just a little smaller than the hole’s opening. Then, slide the upper jaws into the opening.
Continue to move the jaws until they hit the walls of the hole. When you feel them touch, twist the lockscrew and remove the calipers.
Tip: If slippery hands make it difficult for you to turn the screws, wear work gloves with a slip-resistant grip.
5
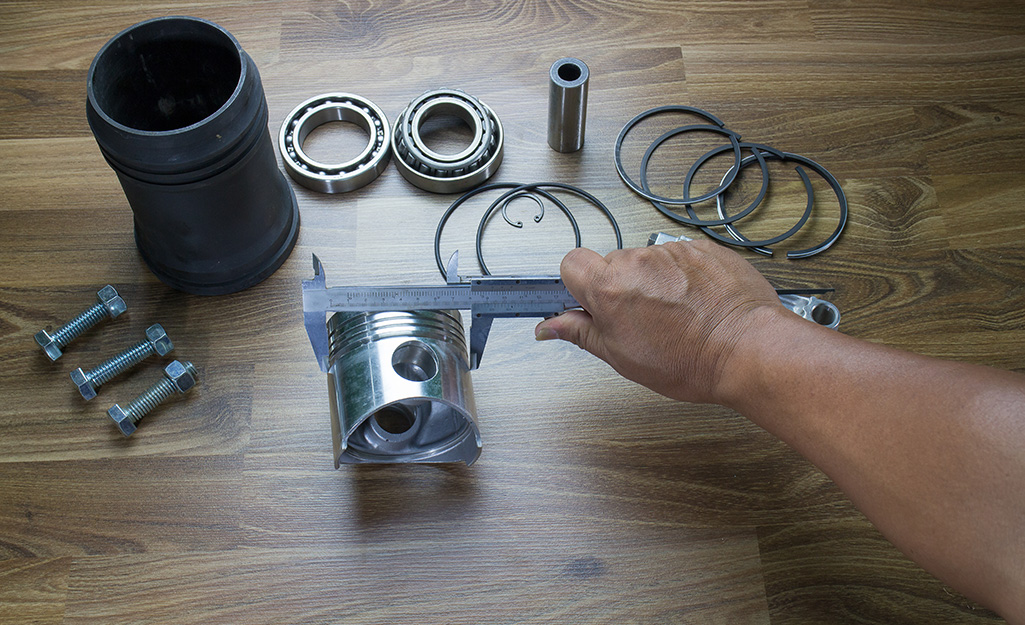
Measure Outside Dimensions Correctly
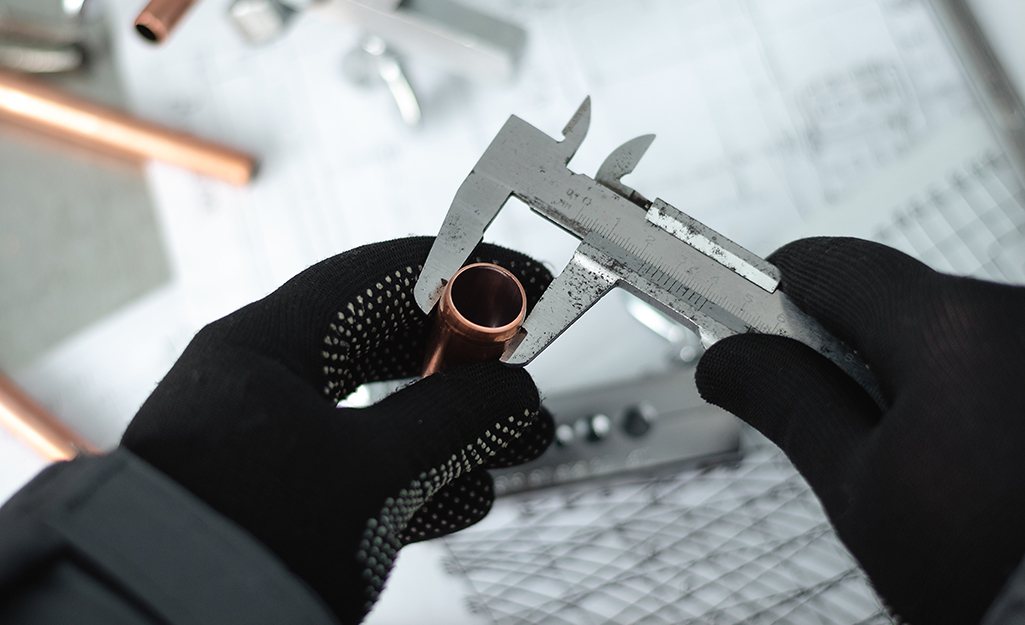
To measure the outside diameter of a cylinder like a piece of pipe, first unlock the lock screw.
Push the thumbscrew to the right to widen the lower jaws. Move them until they are slightly larger than the object, then place the jaws around the object.
Slide the thumbscrew until the jaws clamp snugly onto the item. Turn the lockscrew to set them in place. Then, take the measurement.
6
Measure Distance Correctly
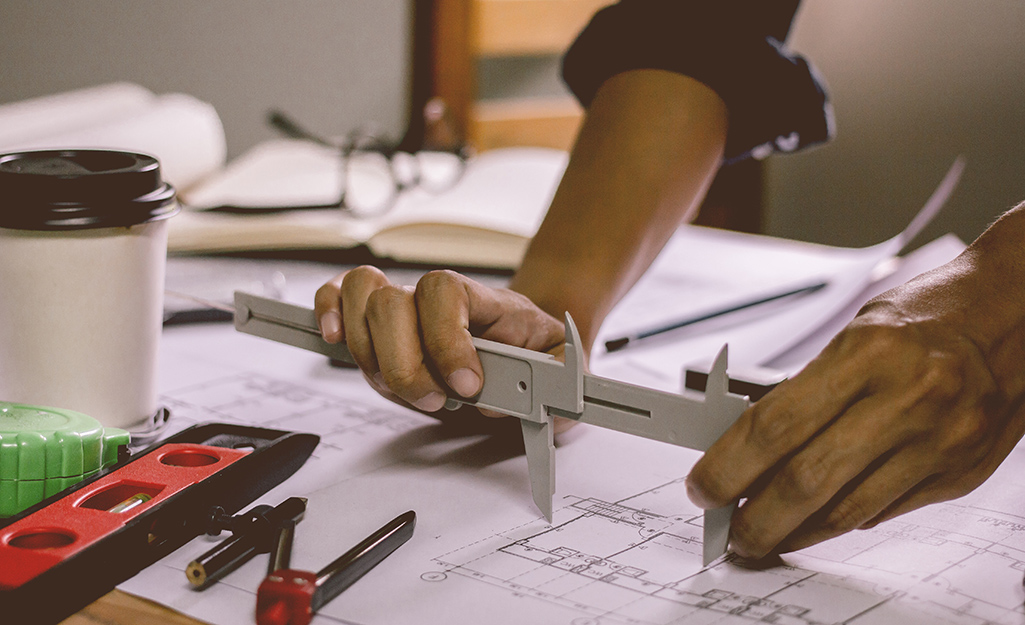
To measure the distance between two objects or points, place the jaws between them. Adjust the jaws so that they fit snugly and turn the lockscrew. Finally, take the measurement.
7
Measure Depth Correctly
To measure the depth of a hole, use the depth rod on the calipers. First, unlock the top screw and adjust the thumb screw to get the rod to stick out.
Continue to twist the thumbscrew until the end of the beam scale touches the top of the hole. Then, move the rod so it sits flat against the bottom of the hole. It should also touch one wall of the hole.
Once the rod is in place, turn the lock screw to tighten the jaws. Remove the calipers from the hole and take the measurement.
8
Determine Measurements with Spring Joint Calipers
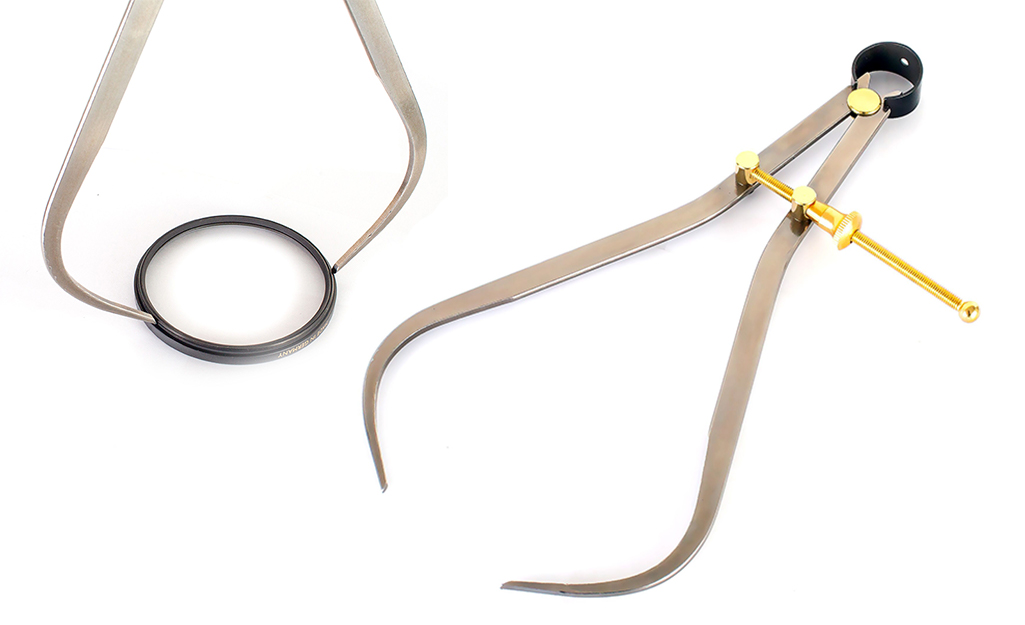
To use and read spring joint calipers, first adjust the nut to open the legs of the caliper. Put whatever you want to measure between the legs.
Tighten the nut until the legs touch the sides of the object. Slip the object out. If you can’t get the item free, loosen the nut slightly.
Put a ruler flat on your work surface with the measurement markers facing up. Put one leg at the 0 end of the scale. Read the ruler where the second leg rests to find out the length, thickness or diameter of the item.
9
Check the Scale
Depending on the calipers you choose, the measurement scale may be in inches (Imperial system) or millimeters (metric system). Some calipers will have both measurement systems marked on their scales. With this type of caliper, be consistent and take all measurements for a project in metric or Imperial units.
Tip: There are 25.4 millimeters in 1 inch. To convert from inches to millimeters, multiply the measurement by 25.4. To go from millimeters to inches, divide by 25.4. A calculator can do the math for you.
10
How to Read Vernier Calipers
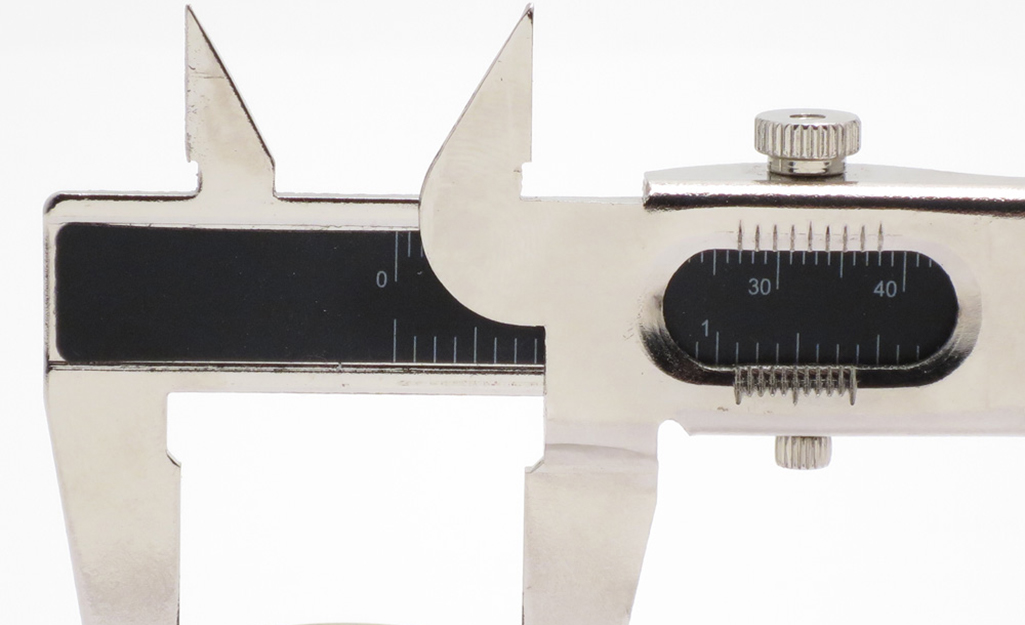
Reading Vernier calipers is a two-step process because of its two scales.
The main scale gives you the whole number and one decimal place after it. On an inch Vernier caliper, each increment on the main scale represents one-tenth (.1) of an inch. Each division in between each tenth of an inch represents twenty-five thousandths (0.025) of an inch.
The Vernier scale is located on the sliding jaw and typically has 25 graduations. The scale gives you the second decimal place in the reading and represents a thousandth of an inch (0.001), with each .005 inch numbered successively as 0, 5, 10, 15, 20 and 25.
To use these scales together, start by reading the large number division first from the main scale to the left of the “zero” of the Vernier scale. Find the largest whole-inch mark to the left side of this index line. Jot down this measurement.
Then, locate the largest .100-inch mark to the left side of this index line. Add this measurement to the whole number.
Turn your attention to the Vernier scale. Record the whole number of .025-inch increments to the left of the index line. Combine this measurement with the one above.
Tip: Use a work light to brighten your work area if you have difficulty seeing the scale.
11
How to Read Dial Calipers
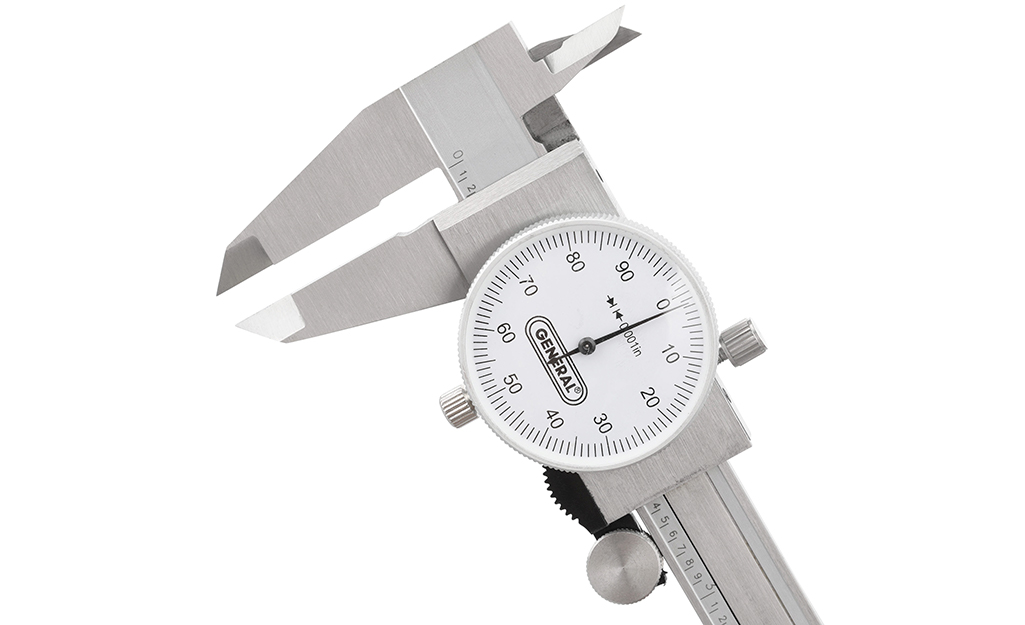
There are two sets of graduations on a dial caliper. The main scale is marked in one-tenth (0.1) inch intervals. The dial is marked in one-hundredth (0.001) inch intervals.
Reading the dial caliper is a two-step process. First, look at the sliding jaw and note the measurement.
Then, figure out where the hand points on the dial. Add these two measurements together to get the total..
12
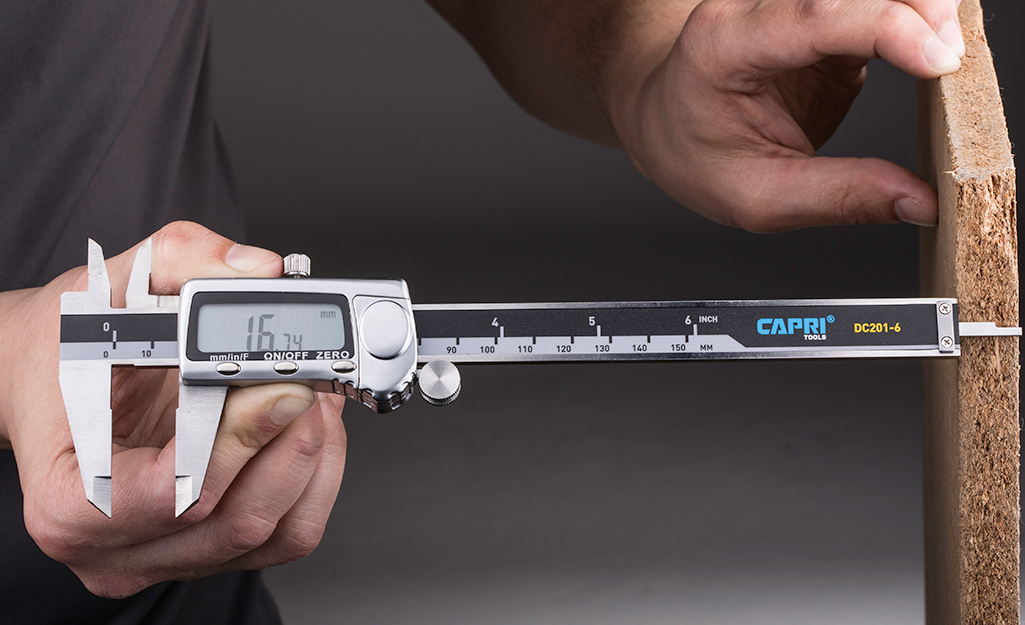
How to Read Digital Calipers
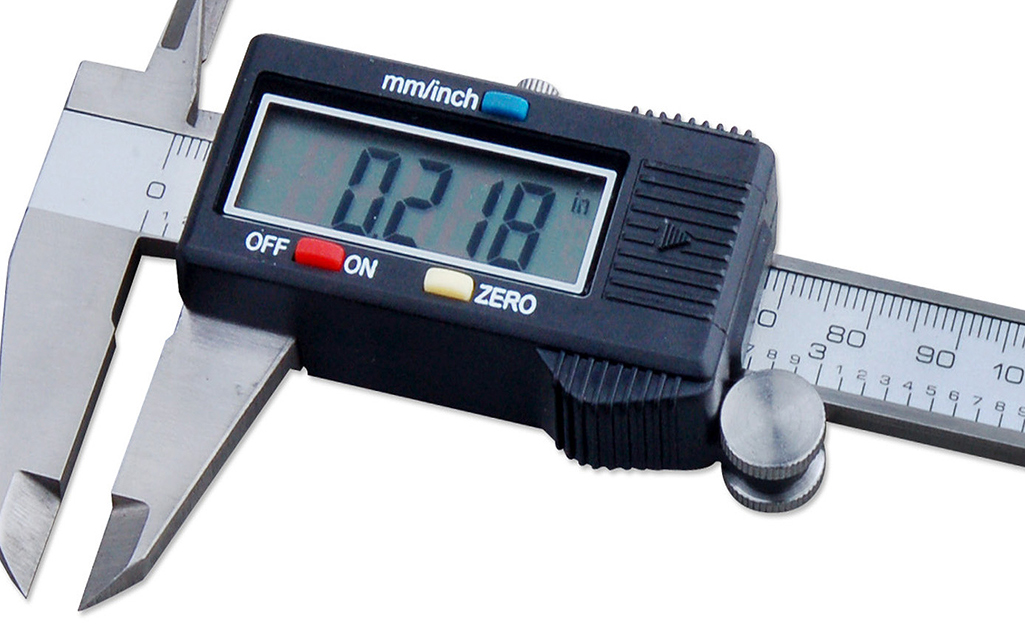
Digital calipers take the guesswork out of reading measurements. The upper right-hand corner usually tells whether the device is set to inches or millimeters.
The far-left number before the decimal point is a whole number measurement. To the right of the decimal point are tenths, hundredths and thousandths.
A fourth number will pop up to the left of the decimal point when the slide is between thousandths, indicating tenths of thousandths.
There is no need to add any numbers together when using digital calipers. Just record the measurement that appears on the display.
Courtesy of Home Depot